tech-blog
A very basic introduction to Node.js - Part 3
November 30, 2019

This is the part 3 of post Intro to Nodejs - part 2.
In this post, we will look at improving our existing code and add new features like password hashing. We will also take a look at JWT tokens.
First we define a User model.
const Users = mongoose.model('Users', {
    name: String,
    email: String,
    password: String,
    date_added: Date
   });
Right. Now we first set up login / Signup.
We will make some changes in the Signup method we wrote in previous tutorial. Remember, we never save passwords as string in database. They are always hashed.
We need to encrypt passwords. Node.js provides us a module for that, Bcrypt. Brcypt causes dependency issues so instead, we will use bcryptjs
npm install bcryptjsbtw I would recommend installing yarn and running yarn add bcryptjs instead.
Lets get back to our code.
we first include bcrypt at the top
const bcrypt = require('bcryptjs');now modifying our /signup method
 app.post('/signup', async (req, res) => {

  try{
    const body = req.body;

    // there must be a password in body

    // we follow these 2 steps

    const password = body.password;

    var salt = bcrypt.genSaltSync(10);
    var hash = bcrypt.hashSync(password, salt);

    console.log('hash - > ', hash);
    // const user = new Users(body);


    // const result = await user.save();

    // res.send({
    //   message: 'Student signup successful'
    // });

  }

  catch(ex){
    console.log('ex',ex)

    res.send({
      message: 'Error',
      detail: ex
    }).status(500);
  }

  });
A couple of things to notice.
- I wrapped the code in try/catch. Always use it when you are using
awaitin the code. - we are using bcrypt to hash the password.
let try it in Postman and see what we get in console.
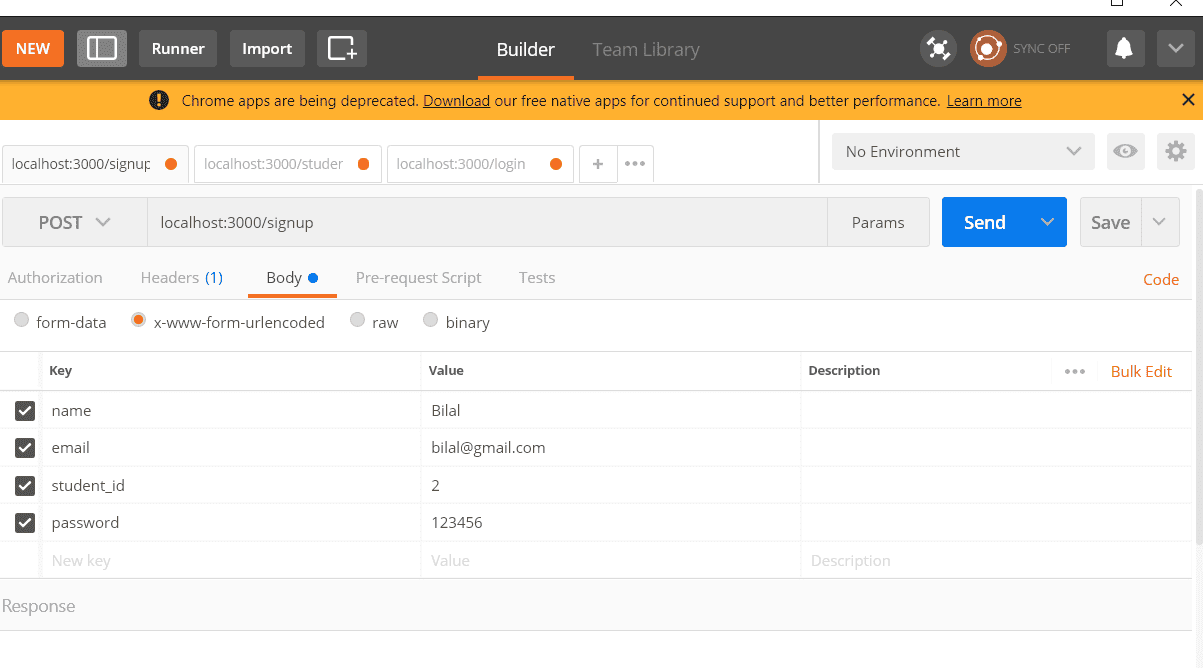
Here’s what we get in our Node.js console
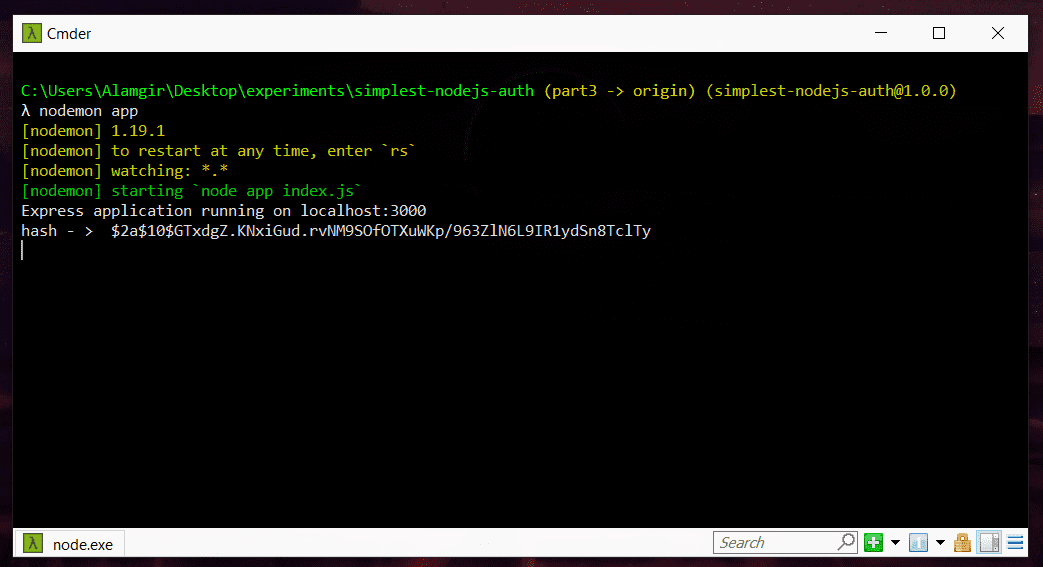
So this means, we will save $2a$10$GTxdgZ.KNxiGud.rvNM9SOfOTXuWKp/963ZlN6L9IR1ydSn8TclTy in database instead of 123456 which gives us more security. Even if our database is hacked, the user wont have direct access to passwords. He only can see the hash.
We still need to do some work in password. we need to replace the old password with new hash.
Just one line added
  const salt = bcrypt.genSaltSync(10);
  const hash = bcrypt.hashSync(password, salt);

  body.password = hash;
new updated code
 app.post('/signup', async (req, res) => {

  try{
    const body = req.body;

    // there must be a password in body

    // we follow these 2 steps

    const password = body.password;

    var salt = bcrypt.genSaltSync(10);
    var hash = bcrypt.hashSync(password, salt);

    body.password = hash;
    console.log('hash - > ', hash);
    const user = new Users(body);


    const result = await user.save();

    res.send({
      message: 'Student signup successful'
    });

  }

  catch(ex){
    console.log('ex',ex)

    res.send({
      message: 'Error',
      detail: ex
    }).status(500);
  }

  });
Lets take a look at the database
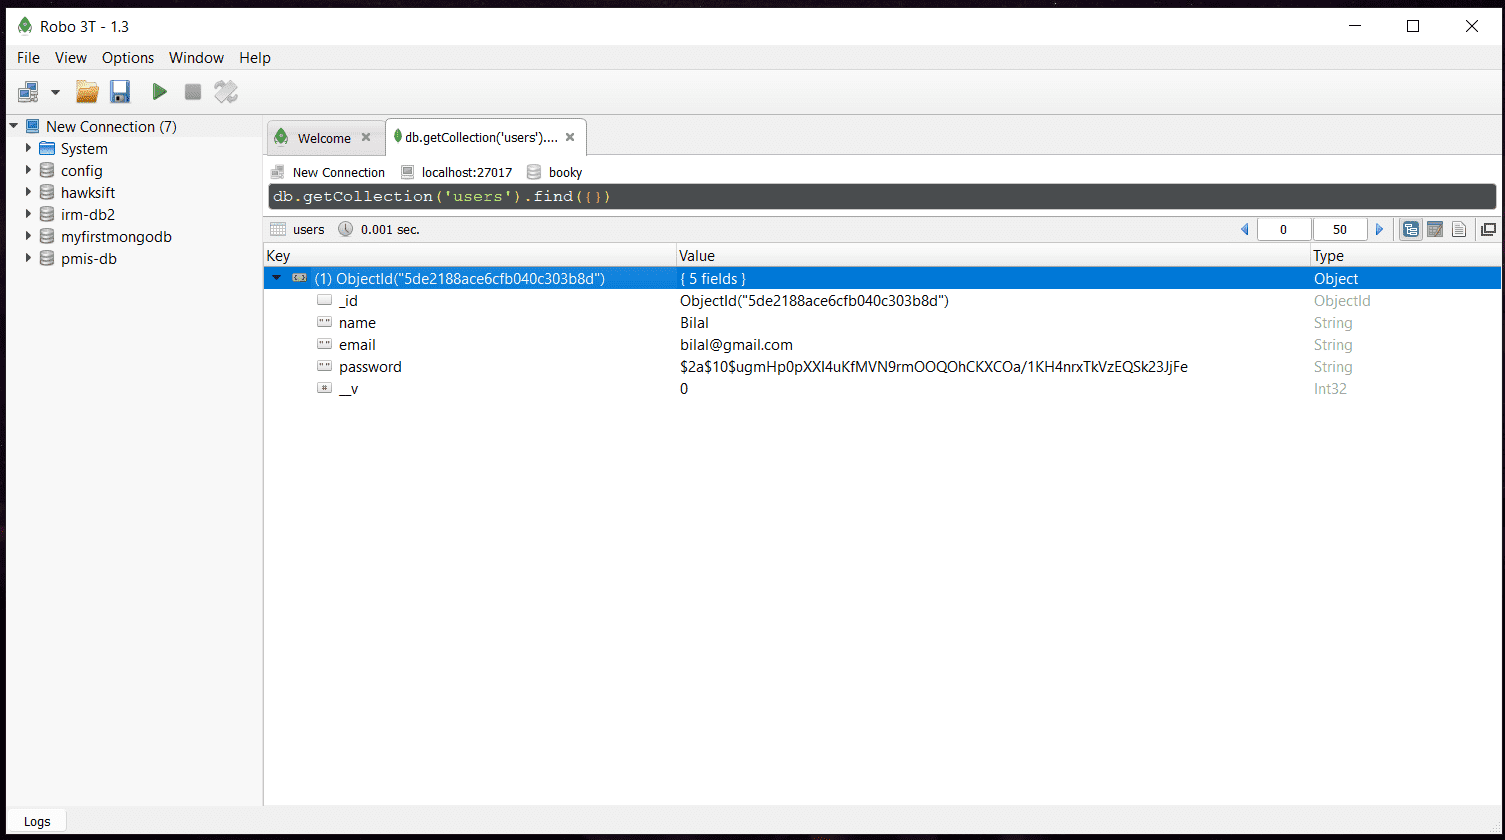
That looks awesome. Exactly what we wanted.
There’s one problem. What if user logins with email bilal@gmail.com and password: 123456, how are we going to check ? we don’t have 123456 saved but instead, the hash.
Lets see how we will modify our login method
Here’s what we’re doing now
app.post('/login', async (req, res) => {
try {
const body = req.body;
const email = body.email;
// lets check if email exists
const result = await Users.findOne({ email: email });
if (!result) {
// this means result is null
res.status(401).send({
Error: 'This user doesnot exists. Please signup first'
});
} else {
// email did exist
// so lets match password
if (body.password === result.password) {
// great, allow this user access
console.log('match');
res.send({ message: 'Successfully Logged in' });
} else {
console.log('password doesnot match');
res.status(401).send({ message: 'Wrong email or Password' });
}
}
} catch (ex) {
console.log('ex', ex);
}
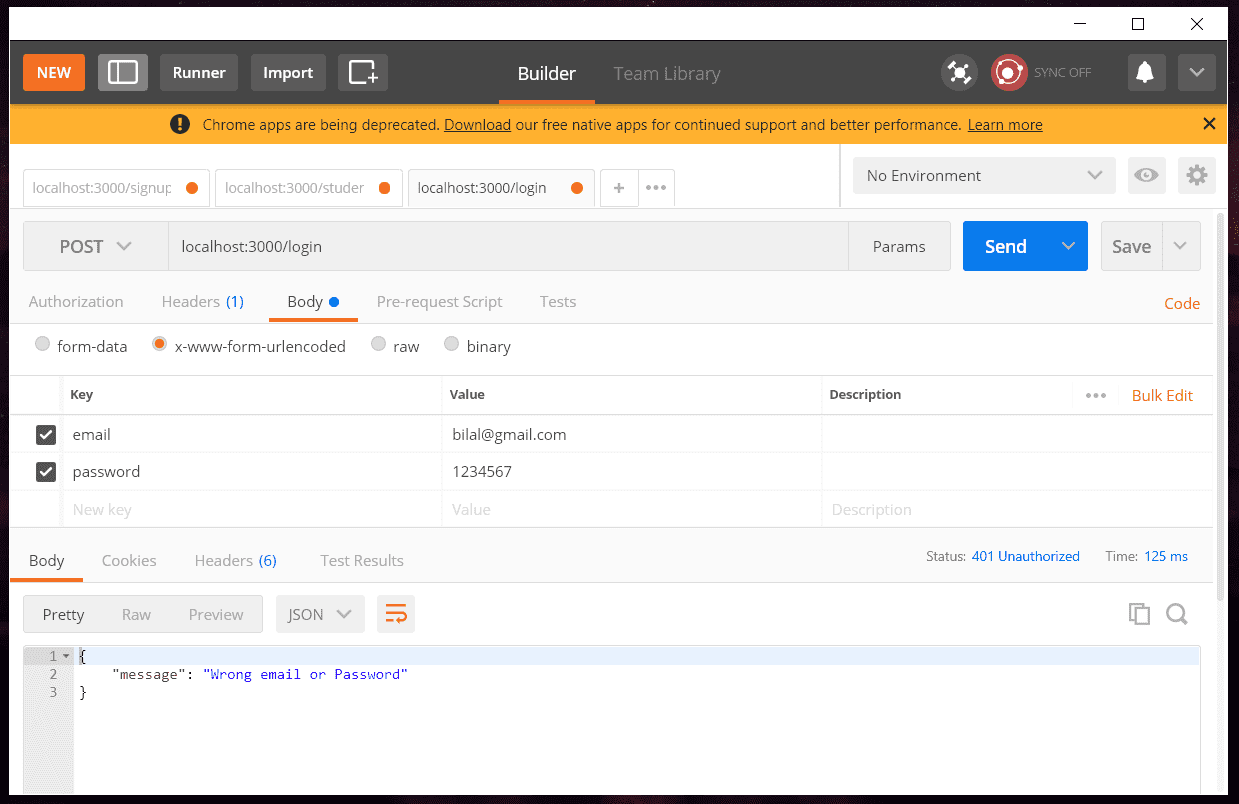
});Lets try it
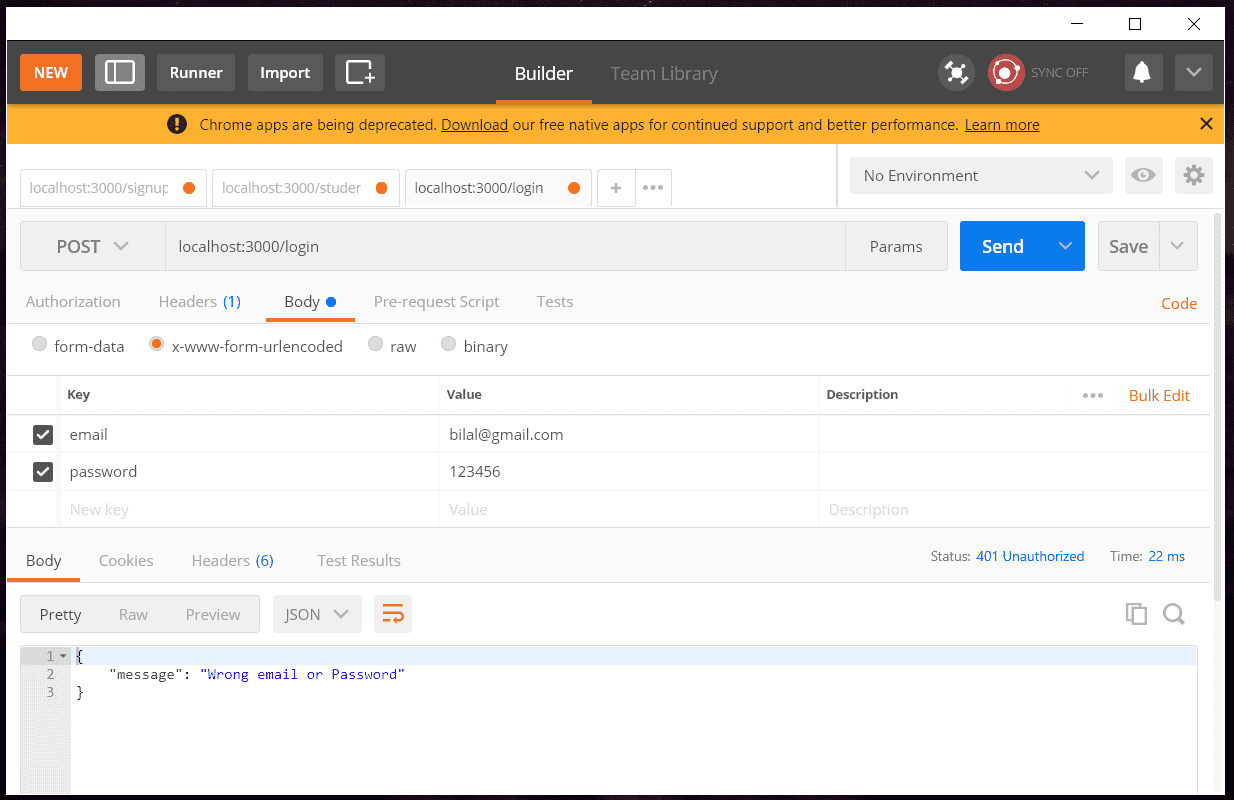
It’s saying wrong email/password even though its right :/
we make just 1 line change in our code. we compare it using bcrypt
if ( bcrypt.compareSync(body.password, result.password))Now using wrong login
Now using correct login

Hurray !!!
Here is the complete code
app.post('/login', async (req, res) => {
  try {
    const body = req.body;

    const email = body.email;

    // lets check if email exists

    const result = await Users.findOne({ email: email });
    if (!result) {
      // this means result is null
      res.status(401).send({
        Error: 'This user doesnot exists. Please signup first'
      });
    } else {
      // email did exist
      // so lets match password

      if ( bcrypt.compareSync(body.password, result.password)) {
        // great, allow this user access

        console.log('match');

        res.send({ message: 'Successfully Logged in' });
      } else {
        console.log('password doesnot match');

        res.status(401).send({ message: 'Wrong email or Password' });
      }
    }
  } catch (ex) {
    console.log('ex', ex);
  }
});
we learned how to use password hashing. We allowed user to sign in. There’s still one more thing we need to do. Once a user logs in, we need to provide it a token. That token will tell us which user it is. With that token, that user can make changes to our database but without that token, a user cannot make any changes to our database or access our secure apis. Token kindof works as a guards for us. remember Route Guards? the concept is very similar.
We will use JWT Tokens.
What we will do is whenever a user successfully logins, we will create a JWT token and send it back in response. This means whenever an Angular / Web App / Mobile app user successfully logins, he will get back a token in return. We will then save that token. For now, lets just see how to create it.
What happens in real world apps is that every protected request send via HTTP includes some sort of token. that token tells the server / us where the request came from, who is the user etc. Lets see how we incorporate that.
First, we need to add a JWT module for Express.
npm install jsonwebtoken

or

yarn add jsonwebtoken
include jsonwebtoken at the top
const jsonwebtoken = require('jsonwebtoken');Now lets create a JWT Token
Lets update the /Login method
if ( bcrypt.compareSync(body.password, result.password)) {
        // great, allow this user access

        console.log('match');

        const token = jsonwebtoken.sign({
           data: body,
           role: 'User'
        }, 'supersecretToken', { expiresIn: '7d' });

        console.log('token -> ', token)

        res.send({ message: 'Successfully Logged in', token: token });
      }
what we’re doing here is using the jsonwebtoken module to sign some data. Note with body, we also send role. Here, we can handle multiple roles e.g admin, teacher etc. We manage rules using tokens as well.
Lets try to login using postman and see if we get the token in console.
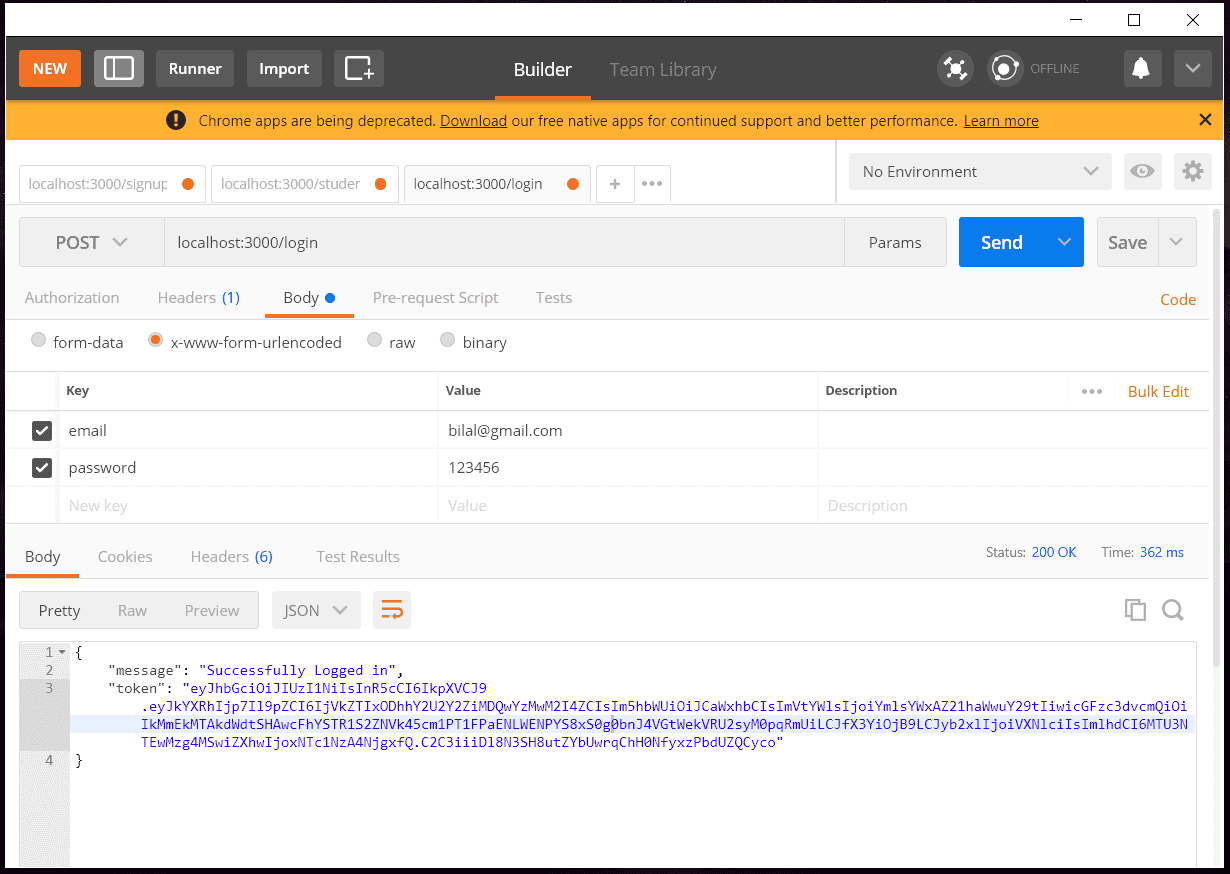
You can see the token in the response.
eyJhbGciOiJIUzI1NiIsInR5cCI6IkpXVCJ9.eyJkYXRhIjp7Il9pZCI6IjVkZTIxODhhY2U2Y2ZiMDQwYzMwM2I4ZCIsIm5hbWUiOiJCaWxhbCIsImVtYWlsIjoiYmlsYWxAZ21haWwuY29tIiwicGFzc3dvcmQiOiIkMmEkMTAkdWdtSHAwcFhYSTR1S2ZNVk45cm1PT1FPaENLWENPYS8xS0g0bnJ4VGtWekVRU2syM0pqRmUiLCJfX3YiOjB9LCJyb2xlIjoiVXNlciIsImlhdCI6MTU3NTEwMzg4MSwiZXhwIjoxNTc1NzA4NjgxfQ.C2C3iiiDl8N3SH8utZYbUwrqChH0NfyxzPbdUZQCyco
Let open jwt.io
Lets copy and paste the token on the left hand side.
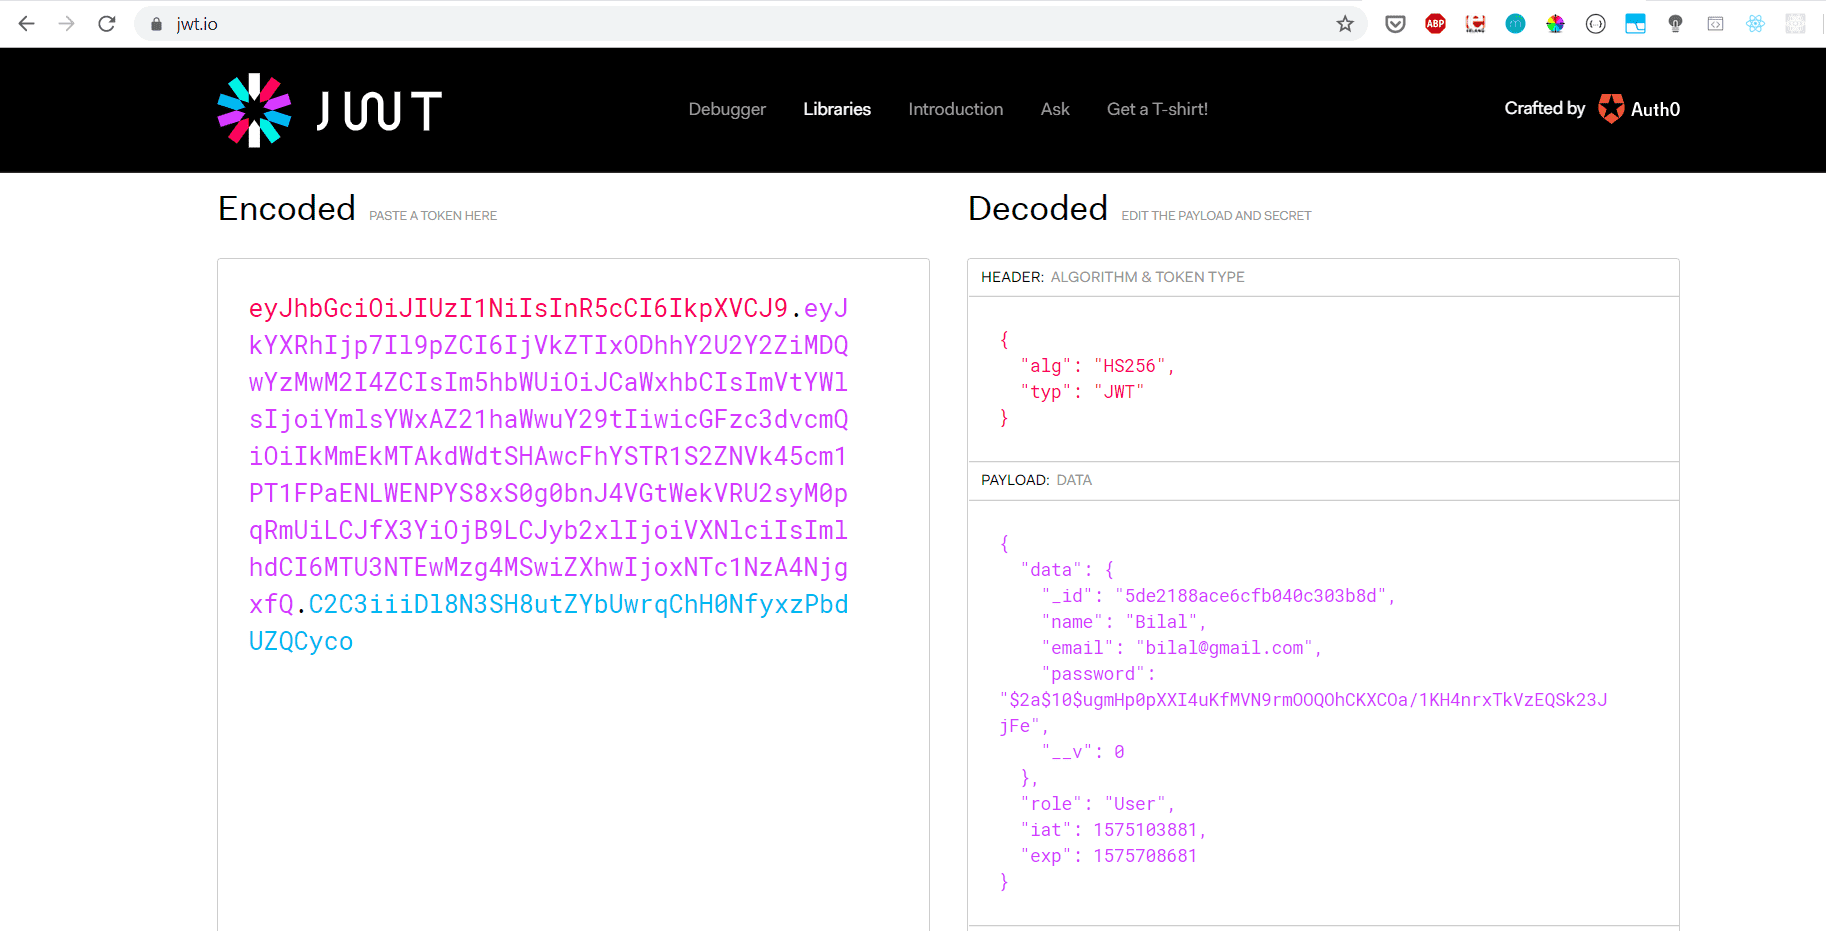
When we decode it, we can see the data for e.g User Email, ID, Role etc. We also see password which should not be in that token. so we can remove it by
  delete result['password'];

        const token = jsonwebtoken.sign({
           data: result,
           role: 'User'
        }, 'supersecretToken', { expiresIn: '7d' });
if delete doesn’t work
then just do
result.password = undefined;now the JWT token won’t have password. Btw, the token will expire after 7 days. the secret key with which we can validate the token is supersecretToken. Right now, we wrote this in code which is a bad practice. We will fix this in the next tutorial.
So in this, we improved our Login/Register methods with better practices such as password hashing and usage of JWT Tokens.
Here is the look at the final code Link to code of part 3
There are still some things we can improve in this workflow. First of all, one index.js with all the code is not a good approach at all. We need to split things up. 2. we wrote secret information such as database name, JWT token secret key inside code which is a BAD practice. we never write it in code. we define them in environment variables. In the next post, we will cover that.

Hey there, I'm Alamgir Qazi. I work as a full-stack JavaScript Developer. I'll be sharing what I've learned about Angular, Node, Docker, Kubernetes and other cool things.